
How to Write ASL
The following information is a general guide to help you get started. For full information and practice, check out the book How to Write American Sign Language.
There are 5 steps to learning written ASL:
1) Handshapes/Digits
2) Movement Marks
3) Location
4) Facial Expression
5) Indicators/Punctuation
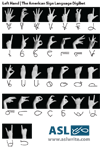
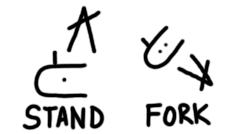
The basic blocks of American Sign Language are the handshapes. In written ASL, they are called the digits, and sequenced into the digibet. The digibet is available for download below.
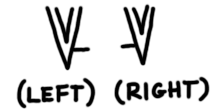
The left hand digibet is exactly the same as the right hand, except reversed. It is very important to remember the difference between the left hand and the right hand. This helps establish space on paper.
Handshapes rotate and bend. Diacritics show those motions on paper. Usually the first handshape used is the one written.
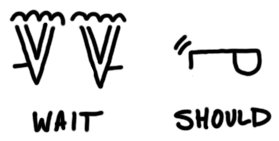
Particular finger motions can also be shown.
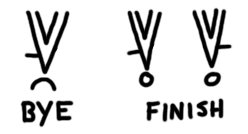
When handshapes make contact, dots are added. Those are called contact points.
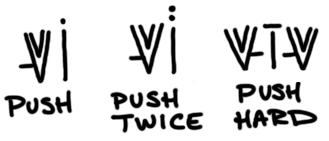
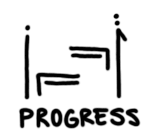
ASL handshapes rarely stay stationary. To show movement, motion lines are used. Write from your own perspective as a signer -- if you sign to your right, the direction on paper goes to the right as well.

One dot shows that the motion takes place once. Two shows the motion goes twice, and so on. Dashes show strong motions.
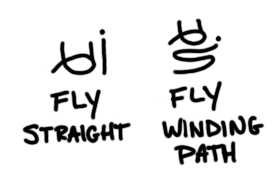
Lines do not always have to be straight. They can follow the same path of the actual sign, to an extent.
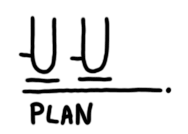
To distingish when the hands are "on edge," extra lines are placed under the handshapes.
Sometimes signs take turns in motion. An alternating mark shows which handshape moves first.
Signs that morph across different handshapes use a similar, but longer line.
Circles show that the handshapes rotate around each other.
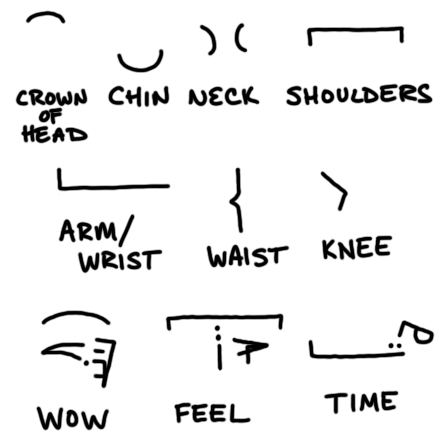
Many ASL signs have particular places on the body where they are signed. Directions are written outward or inward from the body part on paper, and a dot is added where signs come in contact with the body. Two dots show a repeated sign.
For signs that go outward from the body, use the following illustrations:
For signs that go across the body, use the following illustrations:
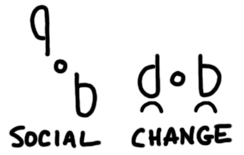
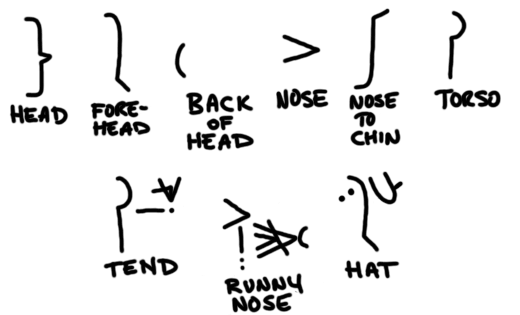
Expressions are important in ASL. Eyebrows move up and knit.
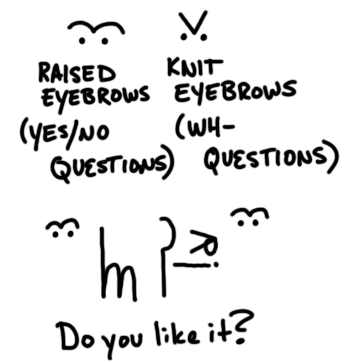
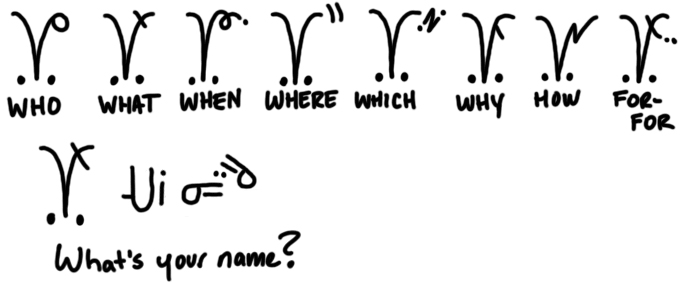
To ask specific questions, such as the wh- questions, there is a special set to signify them.
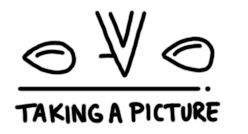
Mouth shapes are especially used for classifiers.
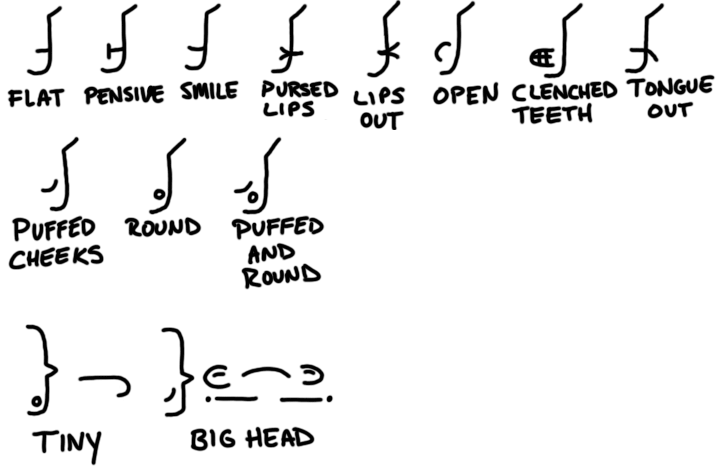
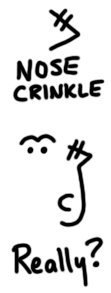
The nose can crinkle as well.
One of the most important things about ASL is its rhythm. Pauses in signing must also be conveyed in written ASL. This is done by writing a small circle.

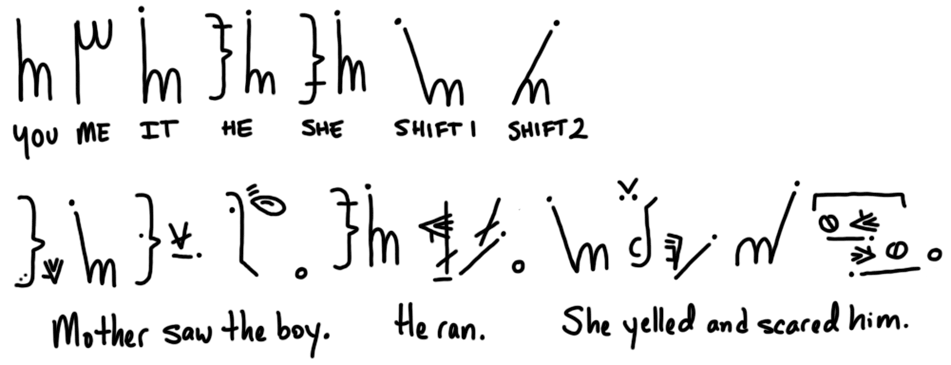
Shifts between speakers are shown by several words:
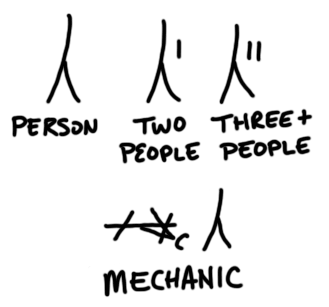
People are shown by a special symbol, with marker added to signify amount (up to three).
Now you know the basics of written ASL! Do keep in mind that knowing signed ASL doesn't mean you will instantly be able to write and read written ASL. It takes practice. The above primer is meant to help you get a start. Search the dictionary to find out how to write specific ASL signs and visit our forum for more practice and information.
[Written ASL (si5s) is the invention of Robert Arnold. Learn more about him here.]